This page is part of archived documentation for openHAB 3.3. Go to the current stable version
# Before using blockly in openHAB
# Preface
Blocklies are an easy entry to the world of writing rules. However, after some times, you end up writing more and more complex rules, so more sooner than later you will encounter some challenges. This section intends to provide some hints to get started and how to deals with those challenges. Please read them carefully before asking questions in the forum.
# OpenHAB Configuration Files
Some openHAB blocks rely on particular configuration files found in the openHAB configuration folder. This folder is referred to as $OPENHAB_CONF in this page, and the location of this folder for your setup can be found via the UI: Help & About -> Technical Information -> Configuration folder.
- via mounting the files shares from the server to your client-PC.
In the main UI as an admin you can go to Help & About and will have the different folder locations under Technical information.
- the exact configuration of the shares can be found on your server at /etc/samba/smb.conf (opens new window).
- Use the share openHAB-conf when mounting it from Windows or MacOS
Link the openHAB share in Windows
- Find you openHAB-Server via the network share functionality
- User the share openHAB-conf to assign it to a network drive
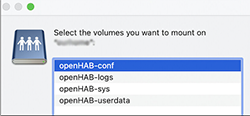
Link the openHAB share in macOS
Finder -> Go -> Connect to Server
- Enter the username and server name to connect to the openHAB Server

- then choose the folder you want to mount
Finding it on Linux
- Access the folder directly on the openHAB server at /etc/openhab
All methods reveal the following folders
- html
- icons
- items
- services
- html
- persistence
- rules
- scripts
- sitemaps
- sounds
- things
- transform
# Creating a blockly rule via the UI
Also view  Creating a Blockly Rule (opens new window)
- go to Settings -> Rules
- press
 on bottom right
 - enter a unique id and rule name for your new blockly rule
- Under "When" click on "Add Trigger" to define a trigger for the rule (you may add multiple triggers which are perceived as any of those triggers may occurs which stands for an OR combination of the triggers)
- choose a title for the rule
- choose "item" (or something else) that should trigger the rule
- select the item from your model and the click PICK on the upper right corner
- choose "received a command", "was updated" or "changed"
- Under "Then" click on "Add Action"
- choose

- click on
 und you should now see this screen

- you can now click the
 to access all openHAB Blocks.
 - Drag and Drop the blocks to the white area
- Press
Ctrl-s(Windows) orCommand-s(MacOS) to save your rule - Press
Ctrl-r(Windows) orCommand-r(MacOS) to directly run your rule with the trigger - Press
Ctrl-d(Windows) orCommand-d(MacOS) to disable / enable your rule. See the following video on How to disable Rules (opens new window) - Click on
 on the lower right of the bottom toolbar to see the generated code and will transition to
  (click again to come back to the blocks).
More about the topic of code generation can be viewed at Blockly as an ECMA-Script code generator (opens new window)
# Block context menu
It should also be mentioned that each of the blocks do have a context sensitive menu which appears upon a right click on the block itself.
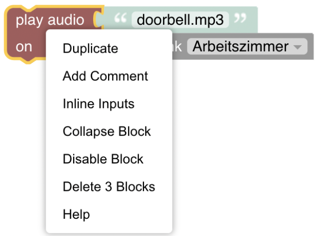
- Duplicate: Clones the block
- Add comment: Adds a comment to the block
- Inline Inputs / External inputs: Switches between horizontal or vertical alignment of inputs
Inline:

External:

- Collapse (expand) block: Shrinks the block to get a better overview
Normal block view:
Collapsed view:

- Disable (enable) block: Disables the block, so no code is generated and its functionality switched off
- Delete: delete the blocks (this can be reverted via Command/Ctrl-Z)
# Zoom the workspace
The following controls allow the workspace to be zoomed:
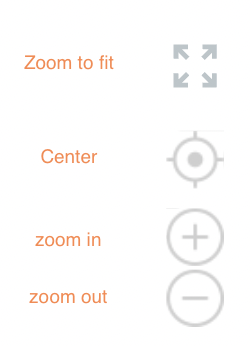
Pinching on a tablet or a touch bar also allows convenient zooming of the workspace.
# Use Frontail for viewing log files
During development the log-block is lot very often which writes information into the log files.
- To be able to conveniently view your log files it is recommended to setup frontail which can be achieved easily via openhabian-config (opens new window)
- Start
openhabian-configon your server and choose option 20 and then option 21 - After installation you can view your logs under openhabian-config (opens new window) (adapt the server name)
- see how to log (opens new window)
More on that topic can be viewed at Logging (opens new window)
# Show an item status watch list besides the blockly rules
In the developer section there is the possibility to add a sidebar to the blockly rules development workspace that allows to watch live status of an item.
View the chapter Debugging Rules with OpenHAB Developer Tools to watch Item-Status (opens new window) for more information